Github Actions enables you to create custom software development lifecycle workflows directly in your Github repository. These workflows are made out of different tasks so-called actions that can be run automatically on certain events.
This enables you to include Continues Integration (CI) and continuous deployment (CD) capabilities and many other features directly in your repository.
In this article, we are going to look at the core concepts of Github Actions and even dive into creating your own custom workflows.
Table of contents
Open Table of contents
Why care about Github Actions?
Before we get into the technical detail let’s discussed why developers should care about Github Actions in the first place and which benefits they provide.
Build into Github
Github Actions is fully integrated into Github and therefore doesn’t require and external site. This means that it can be managed in the same place as all your other repository related features like pull requests and issues.
Multi-container testing
Actions allow you to test multi-container setups by adding support for Docker and docker-compose files to your workflow.
Multiple CI templates
Github provides multiple templates for all kinds of CI (Continuous Integration) configurations which make it extremely easy to get started. You can also create your own templates which you can then publish as an Action on the Github Marketplace.
Great free plan
Actions are completely free for every open-source repository and include 2000 free build minutes per month for all your private repositories which is comparable with most CI/CD free plans. If that is not enough for your needs you can pick another plan or go the self-hosted route.
Core concepts
Below is a list of the core concepts used in Github Actions that you should be familiar with when using it or reading the documentation.
Actions
Actions are the smallest portable building block of a workflow and can be combined as steps to create a job. You can create your own Actions or use publicly shared Actions from the Marketplace.
Event
Events are specific activities that trigger a workflow run. For example, a workflow is triggered when somebody pushes to the repository or when a pull request is created. Events can also be configured to listen to external events using Webhooks.
Runner
A runner is a machine with the Github Actions runner application installed. Then runner waits for available jobs it can then execute. After picking up a job they run the job’s actions and report the progress and results back to Github. Runners can be hosted on Github or self-hosted on your own machines/servers.
Job
A job is made up of multiple steps and runs in an instance of the virtual environment. Jobs can run independently of each other or sequential if the current job depends on the previous job to be successful.
Step
A step is a set of tasks that can be executed by a job. Steps can run commands or actions.
Workflow
A Workflow is an automated process that is made up of one or multiple jobs and can be triggered by an event. Workflows are defined using a YAML file in the .github/workflows directory.
Using workflow and action templates
The easiest way to get your workflow going is by using one of the many workflow and action templates available on the Github Marketplace. If you are not sure which actions could be useful you can take a look at the provided suggestions from Github which are unique for every repository.
Adding a workflow template
On the main page of your repository navigate to Actions.

Then pick a template you would like to use and click Set up this workflow.
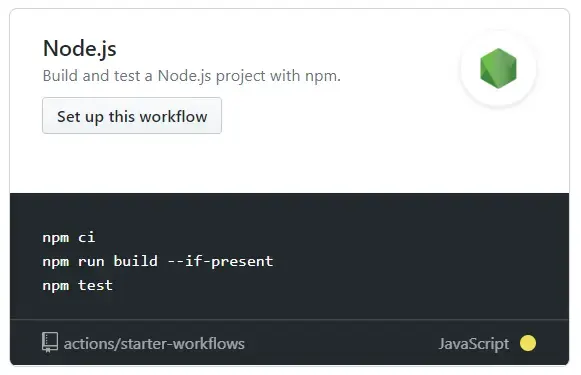
Lastly, you can make changes in the editor and commit the action to your repository using the Start commit button.
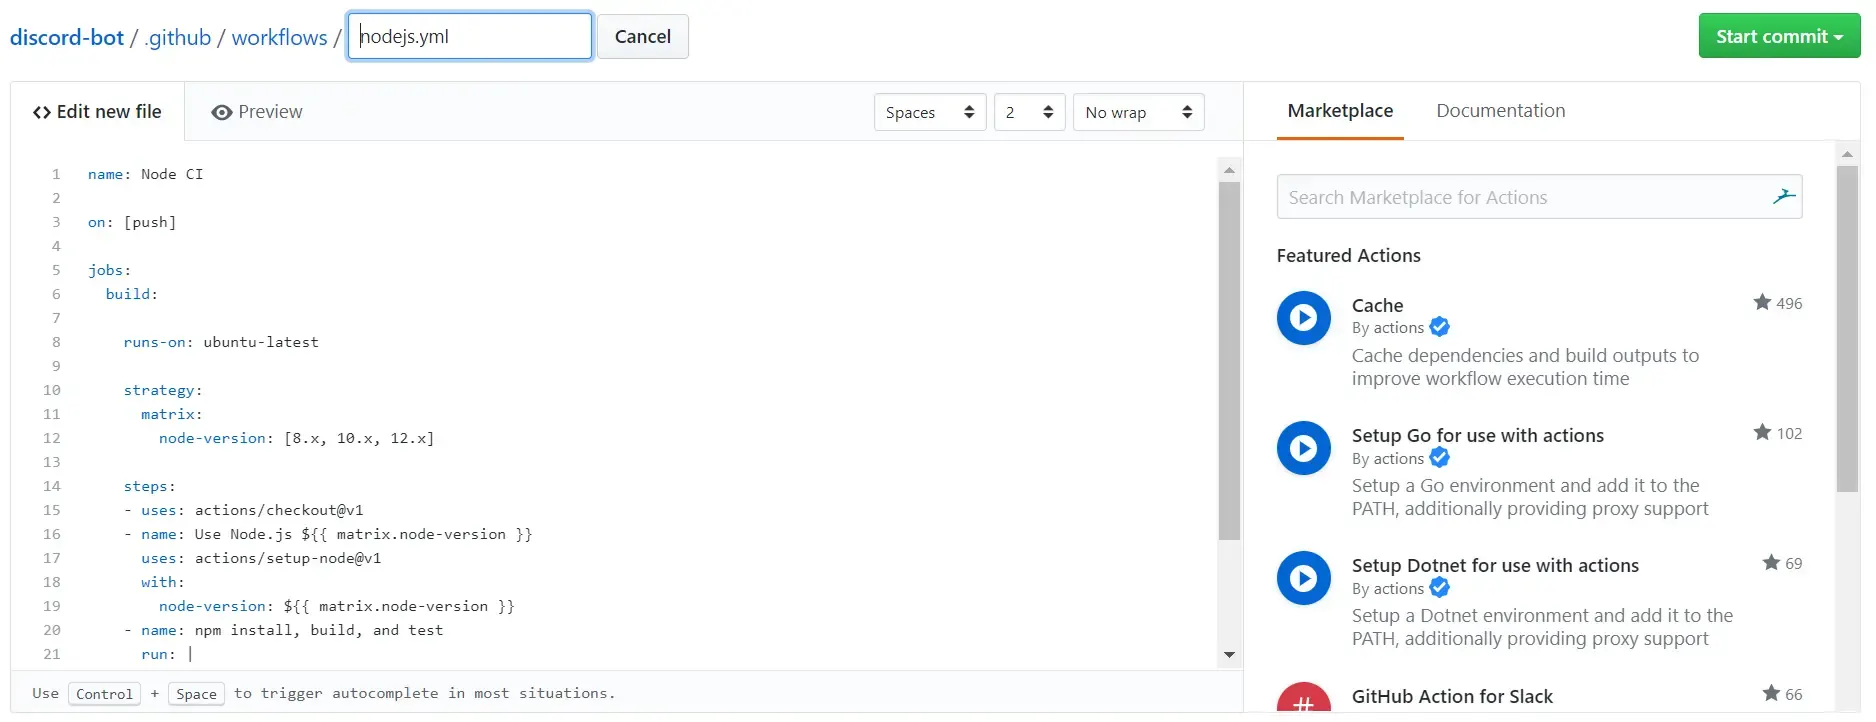
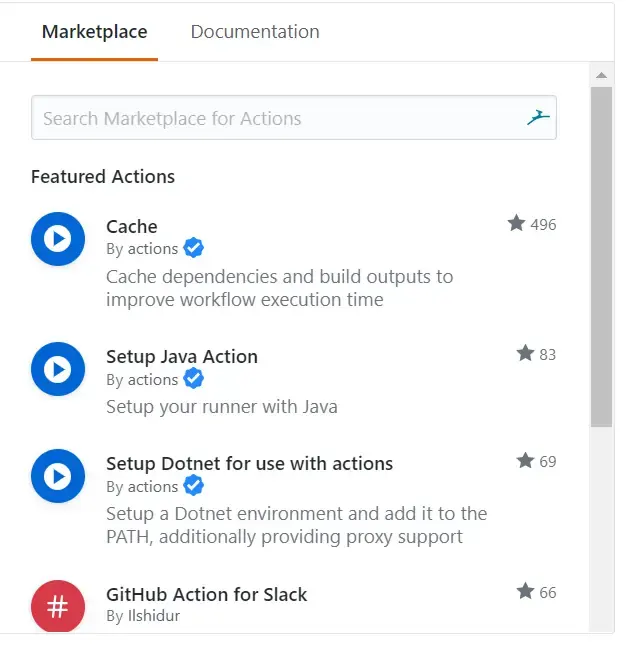
Adding an action template to your workflow
Action templates can be found on the Github Marketplace or directly in the workflow editor on the far right side.
The template can be added by copying the code of the actions and pasting it into your .yml file. The unique action name and version number need to be defined with the uses keyword.
Note: Some actions require you to set certain variables which we will get into later.
Configuring a workflow
Now that you know how to use templates for your workflow you may still be wondering about the syntax used to write and configure workflows yourself.
This chapter will cover the general syntax as well as the core concepts of workflows and will provide all you need to know to start writing your own workflows.
Creating a workflow file
Workflows can be created inside the .github/workflows directory by adding a .yml workflow file. For example, add .github/workflows/continuous-deployment.yml to your project.
After creating the file you can start working on your workflow.
General syntax
Github Actions files are written using YAML syntax and have eighter a .yml or .yaml file extension. If you’re new to YAML and want to learn more, I would recommend these two articles Learn YAML in five minutes or Introduction to YAML.
Here are the most important concepts for the workflow file.
Name:
The name of your workflow that is displayed on the Github actions page. If you omit this field, it is set to the file name.
name: Continuous DeploymentOn:
The on keyword defines the Github events that trigger the workflow. You can provide a single event, array or events or a configuration map that schedules a workflow.
on: push
# or
on: [pull_request, issues]
Jobs:
A workflow run is made up of one or more jobs. Jobs define the functionality that will be run in the workflow and run in parallel by default.
jobs:
  my-job:
    name: My Job
    runs-on: ubuntu-latest
    steps:
    - name: Print a greeting
      run: |
        echo Hello there!
More about that in a later section.
Env:
Env defines a map of environment variables that are available to all jobs and steps in the workflow. You can also set environment variables that are only available to a job or step.
env:
  CI: true
Choosing an environment
It’s important to run your workflows in the right environments so you can make sure that they will succeed in production circumstances. In this section, we will talk about how you can define the OS and software versions your workflow will run on and how you can configure your own build matrix to run a workflow in multiple environments.
Runs-on:
The runs-on keyword lets you define the OS (Operating System) your workflow should run on, for example, the latest version of ubuntu.
runs-on: ubuntu-latestBuild matrix:
A build matrix allows you to test across multiple operating systems, platforms and language versions at the same time. You can specify a build matrix using the strategy keyword and pass it to runs-on.
runs-on: ${{ matrix.os }}
strategy:
  matrix:
    os: [ubuntu-20.04, ubuntu-18.04]
    node: [6, 8, 10]
Here you run your project on two operating systems and three different versions of Node.js. For more information about a build matrix and the strategy keyword visit the documentation.
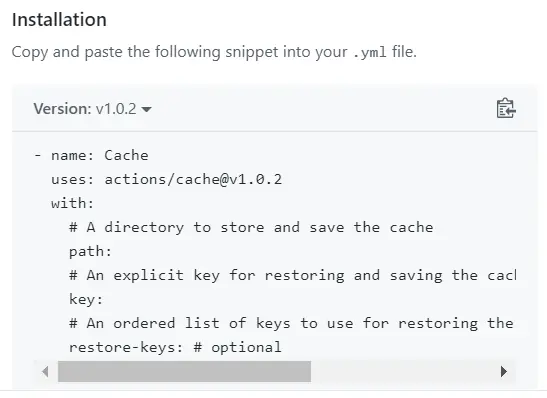
Caching dependencies
Workflow runs often reuse the same output as the previous ones and can therefore be cached for an increase in performance. Every job run on Github-hosted runners starts in a clean virtual environment and don’t use cache by default.
Caching is made possible by the Github cache action which will attempt to restore a cache based on the key you provide. If no match for the cache key is found it will create a new one after the successful completion of the job.
Input parameters:
key(Required): The key identifies the cache and is created when saving the cache.path(Required): The file path of the directory you want to cache or restore.restore-key(Optional): An ordered list of alternative keys to use for finding the cache if no cache hit occurred for the key.
Output parameters:
cache-hit: Boolean variable with success state of the cache action
Example saving npm cache:
name: Caching with npm

on: push

jobs:
  build:
    runs-on: ubuntu-latest

    steps:
    - uses: actions/checkout@v1

    - name: Cache node modules
      uses: actions/cache@v1
      with:
        path: node_modules
        key: ${{ runner.OS }}-build-${{ hashFiles('**/package-lock.json') }}
        restore-keys: |
          ${{ runner.OS }}-build-${{ env.cache-name }}-
          ${{ runner.OS }}-build-
          ${{ runner.OS }}-

    - name: Install Dependencies
      run: npm install

    - name: Build
      run: npm build

    - name: Test
      run: npm test
In this example, we cache the node_modules directory of a Node project so the dependencies don’t have to be installed with every single workflow run.
Persisting workflow data
Artifacts allow you to share data between running jobs and save them after the workflow is complete. An artifact is a file or collection of files produced during a workflow run.
To share data between jobs:
- Upload the file to an archive before the job is complete
- After uploading the file can be used in other jobs within the same workflow
There are some common use cases for saving artifacts.
- Log files
- Test results, failures, and screenshots
- Stress test performance output and code coverage results
Passing data between jobs:
You can use the upload-artifact and download-artifact actions to share data between jobs in a workflow.
name: Share data between jobs

on: [push]

jobs:
  upload-data-job:
    name: Upload data to artifact
    runs-on: ubuntu-latest
    steps:
      - shell: bash
        run: |
          echo Hello World! > hello-world.txt
      - name: Upload hello world file
        uses: actions/upload-artifact@v1
        with:
          name: hello-world
          path: hello-world/hello-world.txt

  download-data-job:
    name: Download data from artifact
    needs: upload-data-job
    runs-on: windows-latest
    steps:
      - name: Download hello world file
        uses: actions/download-artifact@v1
        with:
          name: hello-world
      - shell: bash
        run: |
          value=`cat hello-world/hello-world.txt`
          echo $value > hello-world/hello-world.txt
      - name: Upload hello world to artifact
        uses: actions/upload-artifact@v1
        with:
          name: hello-world
          path: hello-world.txt
In this example, one service creates a file and uploads it to the artifact using the upload-artifact action. The download job then downloads the file and prints it to the console.
For more examples about persisting workflow data visit the official documentation.
Managing a workflow run
You can see and manage your workflow runs on the workflow page of your repository. It allows you to start, cancel and rerun jobs as well as see the results of already complete ones.
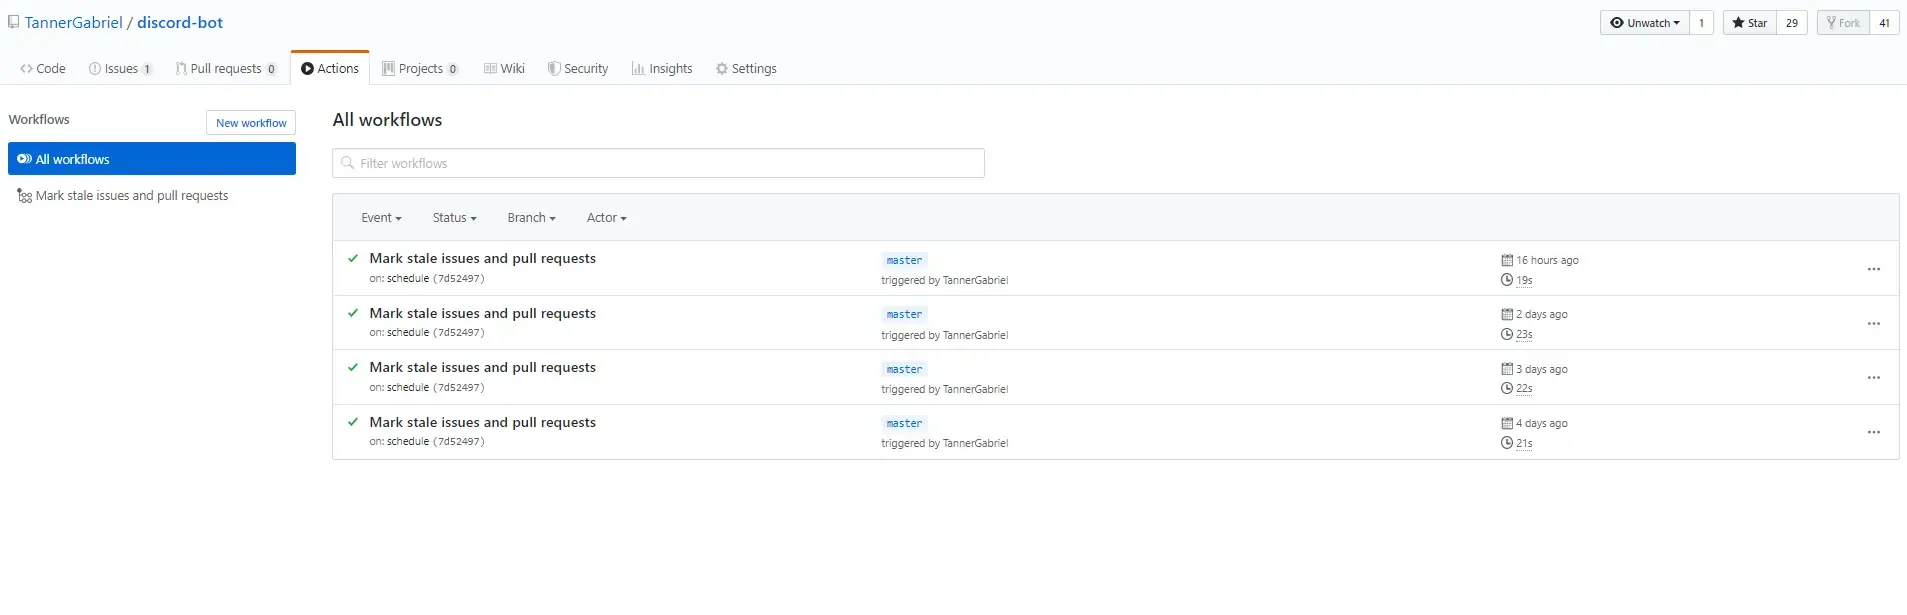
You will get a list of all the workflow run in your repository, and you can get a more detailed view by clicking on a specific one.
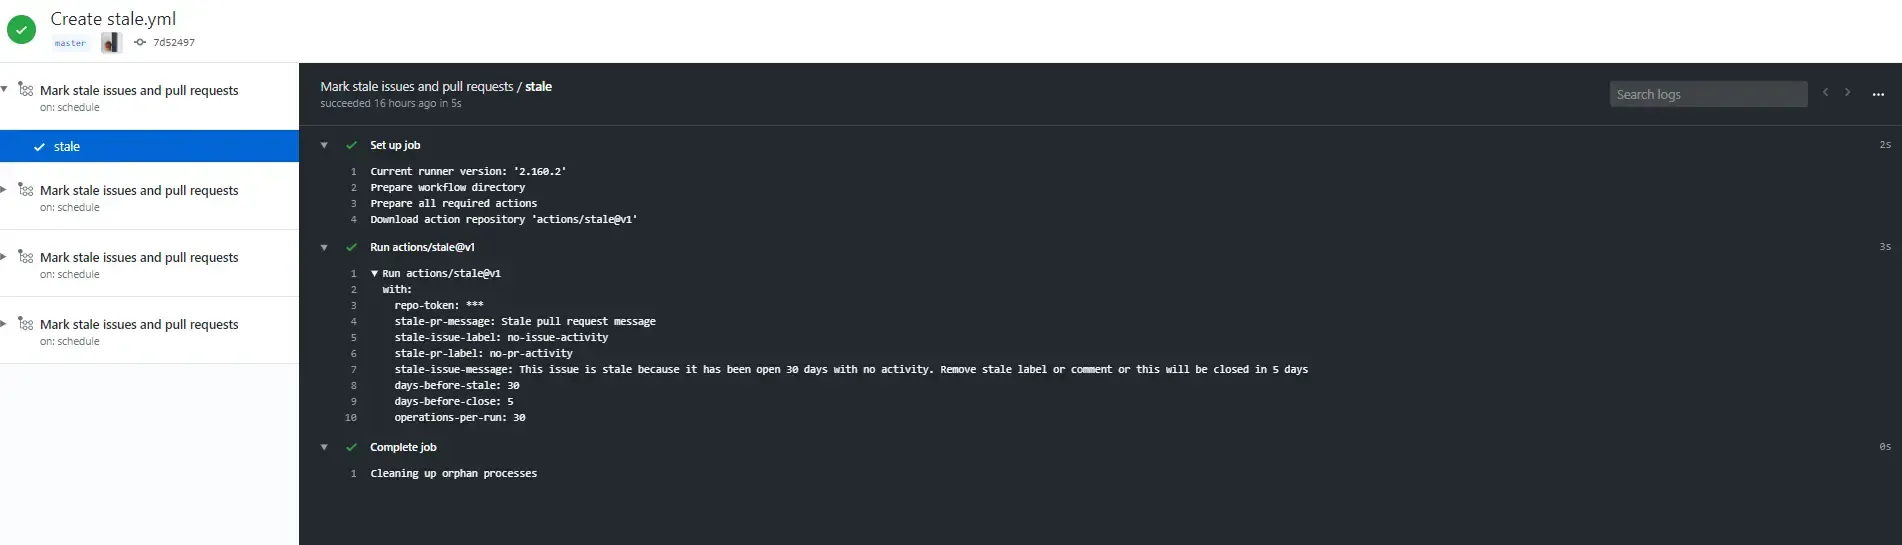
More information can be found in the official documentation.
Building Actions
You can create actions by writing custom code that interacts with your repository and use them in your workflows or publish them on the Github Marketplace.
Github allows you to build Docker and Javascript actions which both require a metadata file with the name of action.yml to define the inputs, outputs and main entry point of your action.
Metadata syntax
As stated above both Docker and javascript actions require a metadata file with the filename action.yml. Here is a list of the available fields and a small description of their functionality.
name(Required) - The name of the action that will be used to identify it in each jobdescription(Required) - A short description of the functionality of the actionruns(required) - The command to run when the action executesauthor(Optional) - The name of the action’s authorinputs(Optional) - A list of input parameters that can be passed in runtimeoutput(Optional) - A list of output parameters that subsequent actions can use later in the workflow
An example file could look something like this:
name: 'Hello World'
description: 'Greet someone and record the time'
inputs:
  who-to-greet:
    description: 'Who to greet'
    required: true
    default: 'World'
outputs:
  time:
    description: 'The time we greeted you'
runs:
  using: 'node12'
  main: 'index.js'
Javascript Actions
JavaScript actions can run directly on any of the GitHub-hosted virtual machines, and separate the action code from the environment used to run the code. They execute faster and are easier to build compared to the Docker alternative.
Docker Action
Docker container package your actions code with the environment and thereby create a more consistent and reliable unit of work. A Docker container allows you to use specific versions of an operating system, dependencies, tools, and code.
Here are some resources that can help you get started with writing your first actions and publishing them:
- Creating a Javascript action
- Creating a Docker container action
- Publish actions in Github Marketplace
Source
- Official Documentation
- Github Blog
- An Unintentionally Comprehensive Introduction to GitHub Actions CI
Conclusion
You made it all the way until the end! I hope that this article helped you understand Github actions and how you can use them to automate your Github workflow.
If you have found this useful, please consider recommending and sharing it with other fellow developers. If you have any questions or feedback, let me know on Twitter or using my contact form.