Websockets is a communication protocol that provides full-duplex communication channels over a single TCP connection established between a web browser and a web server. This allows the server to sent data to the browser without being called by the client.
Today, we are going to take a look at how we can use Websockets to enable real-time communication between different browsers by building a chat application in Nestjs.
So, without wasting any further time, let’s get started.
Table of contents
Open Table of contents
Introduction to Websockets
Websockets are an alternative to HTTP communication in Web applications. They provide a persistent connection between a client and server that both parties can use to start sending data at any time.
This can bring the following benefits:
- The server can send messages to the client without the client explicitly requesting something
- Low latency communication
- The client and the server can talk to each other simultaneously
That’s why Websockets is superior to HTTP when it comes to real-time and long-lived communication.
Project setup
Before we can start coding let’s first set up our project and install the needed dependencies. For that, you need to open your terminal and run the following commands.
First, create the project and move into its directory.
nest new nestchat
cd nestchat
After that, we just need to install the dependencies using the node package manager(npm).
npm i --save @nestjs/websockets @nestjs/platform-socket.ioNow that we have everything installed and the basic project setup out of the way let’s create the files we will work in.
Let’s start by creating the Module, Service, and Controller using the Nest.js CLI
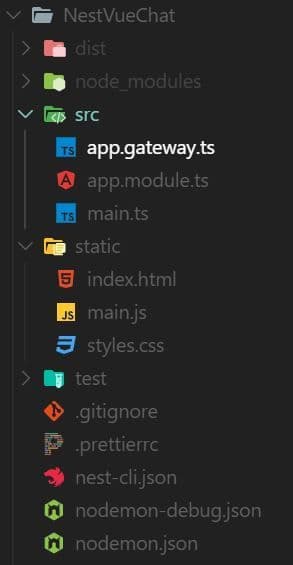
nest g gateway appAfter that, you just need to create a folder with the name of static in your src directory which holds three files:
index.html— Design for our chatmain.js— Client-side WebSockets logicstyles.css— Styling for our HTML file
Now your project structure should look similar to this one.
Now that we have finished the initial setup we can start our server by running the next command.
npm run start:devVoilà, the initial setup is done, now let’s start implementing the Websockets configuration.
Websockets Server
First, let’s start by creating our Websockets server by implementing the WebSocket tools we installed earlier. This is a very simple process that only requires the AppGateway we created above.
import {
 SubscribeMessage,
 WebSocketGateway,
 OnGatewayInit,
 WebSocketServer,
 OnGatewayConnection,
 OnGatewayDisconnect,
} from '@nestjs/websockets';
import { Logger } from '@nestjs/common';
import { Socket, Server } from 'socket.io';

@WebSocketGateway({
  cors: {
    origin: '*',
  },
})
export class AppGateway implements OnGatewayInit, OnGatewayConnection, OnGatewayDisconnect {

 @WebSocketServer() server: Server;
 private logger: Logger = new Logger('AppGateway');

 @SubscribeMessage('msgToServer')
 handleMessage(client: Socket, payload: string): void {
  this.server.emit('msgToClient', payload);
 }

 afterInit(server: Server) {
  this.logger.log('Init');
 }

 handleDisconnect(client: Socket) {
  this.logger.log(`Client disconnected: ${client.id}`);
 }

 handleConnection(client: Socket, ...args: any[]) {
  this.logger.log(`Client connected: ${client.id}`);
 }
}
This is basically all we need to handle the communication for the application, so let’s break it down.
First you will notice that we decorated our class with the @WebsocketGateway() declarator which gives us access to the socket.io functionality.
We also implement three interfaces OnGatewayInit, OnGatewayConnection and OnGatewayDisconnect which we use to log some key states of our application. For example, we log when a new client connects to the server or when a current client disconnects.
Next up we created a member variable called server which is decorated with @WebsocketServer() which gives us access to the websockets server instance.
We make use of the instance in our handleMessage() function where we send data to all clients connected to the server using the emit() function. The handleMessage() function is also decorated with @SubscribeMessage() which makes it listen to an event named msgToServer.
Before we can move on to the client-side of the project we only need to add our gateway to the providers of our module.
import { Module } from '@nestjs/common';
import { AppGateway } from './app.gateway';

@Module({
 imports: [],
 controllers: [],
 providers: [AppGateway],
})
export class AppModule {}
Websockets Client
With the server, complete let’s now move on to the client-side of this project. For that, we are going to use static assets directly in our Nestjs project. To make the layout and state preservation a little bit easier to deal with we are also going to use Vue.js.
First we need to tell our Nestjs application that we want to use static assets by adding a few lines of code to our main.ts file.
import { NestFactory } from '@nestjs/core';
import { AppModule } from './app.module';
import { NestExpressApplication } from '@nestjs/platform-express';
import { join } from 'path';

async function bootstrap() {
 const app = await NestFactory.create<NestExpressApplication>(AppModule);
 app.useStaticAssets(join(__dirname, '..', 'static'));
 await app.listen(3000);
}
bootstrap();
Here we tell express that the static directory will be used to store our static assets which we can only do by importing and using the NestExpressApplication.
Next up we will create the client-side javascript code in our main.js file which we will later use in our layout.
const app = new Vue({
 el: '#app',
 data: {
  title: 'Nestjs Websockets Chat',
  name: '',
  text: '',
  messages: [],
  socket: null
 },
 methods: {
  sendMessage() {
   if(this.validateInput()) {
    const message = {
    name: this.name,
    text: this.text
   }
   this.socket.emit('msgToServer', message)
   this.text = ''
  }
 },
 receivedMessage(message) {
  this.messages.push(message)
 },
 validateInput() {
  return this.name.length > 0 && this.text.length > 0
 }
},
 created() {
  this.socket = io('http://localhost:3000')
  this.socket.on('msgToClient', (message) => {
   this.receivedMessage(message)
  })
 }
})
Here we create a new Vue.js instance and create some basic variables we will later use in our layout.
Next, you can see the created() function which will be executed whenever the frontend is created. In this method, we instantiate our socket variable using the Socketio library we will later import in our frontend. We also add an event listener on our socket which listens for the msgToClient event we created earlier in our server.
Next, we have the sendMessage() function which gets the input from our layout and emits it to our server using the same event if the input is correct.
That is it for our client-side now we only need to create the layout for our application.
Application Layout
To create the layout we just need to add some simple HTML and CSS to our application.
<!DOCTYPE html>
<html lang="en">
<head>
    <meta charset="UTF-8">
    <meta name="viewport" content="width=device-width, initial-scale=1.0">
    <meta http-equiv="X-UA-Compatible" content="ie=edge">
    <link rel="stylesheet" href="https://maxcdn.bootstrapcdn.com/bootstrap/4.0.0-alpha.6/css/bootstrap.min.css" integrity="sha384-rwoIResjU2yc3z8GV/NPeZWAv56rSmLldC3R/AZzGRnGxQQKnKkoFVhFQhNUwEyJ" crossorigin="anonymous">
    <title>Nestjs SocketIO</title>
    <link rel="stylesheet" href="styles.css">
    <script src="https://cdn.jsdelivr.net/npm/vue/dist/vue.js"></script>
    <script src="https://cdn.socket.io/4.3.2/socket.io.min.js" integrity="sha384-KAZ4DtjNhLChOB/hxXuKqhMLYvx3b5MlT55xPEiNmREKRzeEm+RVPlTnAn0ajQNs" crossorigin="anonymous"></script>
</head>
<body>
    <div id="app" class="container">
            <div class="row">
                <div class="col-md-6 offset-md-3 col-sm-12">
                    <h1 class="text-center">{{ title }}</h1>
                    <br>
                    <div id="status"></div>
                    <div id="chat">
                        <input type="text" v-model="name" id="username" class="form-control" placeholder="Enter name...">
                        <br>
                        <div class="card">
                            <div id="messages" class="card-block">
                                <ul>
                                    <li v-for="message of messages">{{ message.name }}: {{ message.text }}</li>
                                </ul>
                            </div>
                        </div>
                        <br>
                        <textarea id="textarea" class="form-control" v-model="text" placeholder="Enter message..."></textarea>
                        <br>
                        <button id="send" class="btn" @click.prevent="sendMessage">Send</button>
                    </div>
                </div>
            </div>
    </div>

<script src="main.js"></script>
</body>
</html>
Here we import the socket.io and vue.js dependencies using script tags and then create a simple layout with two input fields, a message area and a button to send the messages.
You can also notice that we import our main.js file we used above and a custom style sheet that we will create now.
#messages{
 height:300px;
 overflow-y: scroll;
}

#app {
 margin-top: 2rem;
}
Testing the application
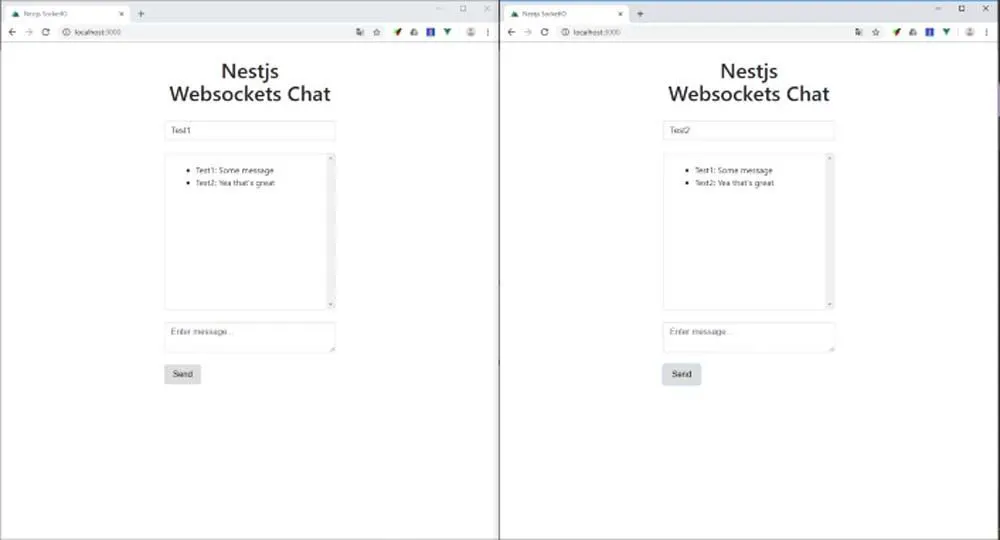
Now that we have finished our chat application it’s time to test it by opening it in two or more browser tabs and writing with each other. For that, let’s start our application and open it in our browser.
npm run startAfter starting it we should see our layout on http://localhost:3000.

Then you just need to type in the name and a message and click send. After sending the message should appear in the second window and should look something like this.
That’s it we have completed our Nestjs chat application using WebSockets. The full code for the project can also be found on my Github.
Conclusion
You made it all the way until the end! I hope that this piece helped you understand the basics of Websockets and how to use them in NestJS.
If you have found this useful, please consider recommending and sharing it with fellow developers. If you have any questions or feedback, let me know in the comments down below.